Embroidery digitizing has made it easier than ever to create beautifully intricate designs for embroidery projects. However, one common challenge that embroiderers often face is how to center their designs accurately on the fabric. Whether you're embroidering a garment, a home decor item, or any other project, centering your embroidery design is essential for achieving professional-looking results. In this article, we'll explore some of the best tips for centering embroidery designs and ensuring that your projects turn out perfectly aligned every time.
1. Measure Twice, Stitch Once
Before you start stitching, take the time to measure and mark the center of your fabric accurately. Use a fabric marker, chalk, or pins to indicate the center point both horizontally and vertically. Double-check your measurements to ensure that the design will be centered precisely on the fabric.
2. Use Embroidery Hoops or Frames
Embroidery hoops or frames can help keep your fabric taut and flat, making it easier to center your embroidery design. Place your fabric in the hoop or frame and adjust it until the center marks align with the center of the hoop or frame. This will ensure that your design is centered properly before you begin stitching.
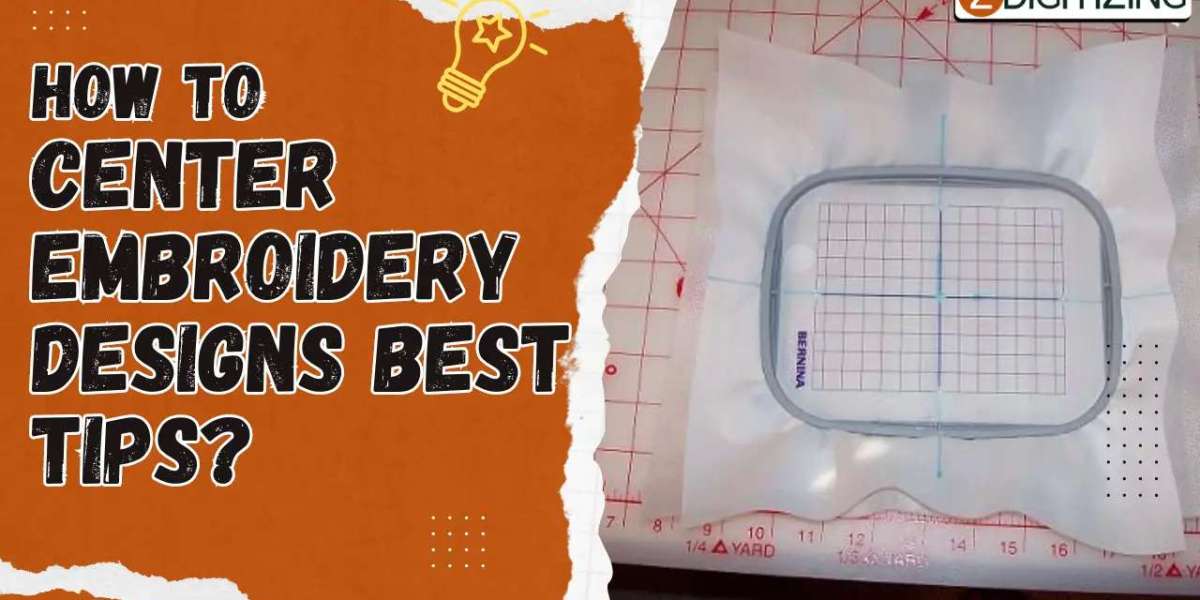
3. Utilize Template or Stencil
Create a template or stencil of your embroidery design on paper or cardboard. Place the template on your fabric and adjust it until it is centered according to your markings. Secure the template in place with pins or weights, then use it as a guide for positioning your embroidery design before stitching.
4. Start From the Center
When positioning your embroidery design on the fabric, start stitching from the center and work your way outwards. This will help ensure that your design remains centered as you embroider, minimizing the risk of it shifting or becoming misaligned during the stitching process.
5. Use Alignment Tools
There are various alignment tools available that can help you center your embroidery designs accurately. These tools range from simple rulers and measuring tapes to more advanced laser alignment devices. Choose the tool that works best for your project and use it to ensure that your design is centered perfectly before you start stitching.
6. Test Stitch
Before stitching your design onto your final fabric, consider doing a test stitch on a scrap piece of fabric. This will allow you to check the placement and alignment of the design before committing to stitching it onto your project. Make any necessary adjustments to ensure that the design is centered correctly before proceeding.
7. Take Your Time
Centering embroidery designs requires patience and attention to detail, so don't rush the process. Take your time to measure, mark, and position your design accurately before you start stitching. Remember that a little extra time spent on centering your design will pay off in the form of beautifully aligned embroidery.
Conclusion
Centering embroidery designs is a crucial step in achieving professional-looking results in your embroidery digitizing projects. By following these tips and techniques, you can ensure that your designs are centered accurately on the fabric every time. Whether you're embroidering garments, home decor items, or accessories, taking the time to center your designs properly will result in stunning finished products that showcase your skill and attention to detail.
Embroidery digitizing plays a crucial role in centering embroidery designs accurately, allowing embroiderers to translate their artistic vision into digital embroidery files that can be stitched with precision and accuracy. With the right tools, techniques, and expertise, you can center your embroidery designs like a pro and create beautiful embroidered masterpieces that delight and inspire.